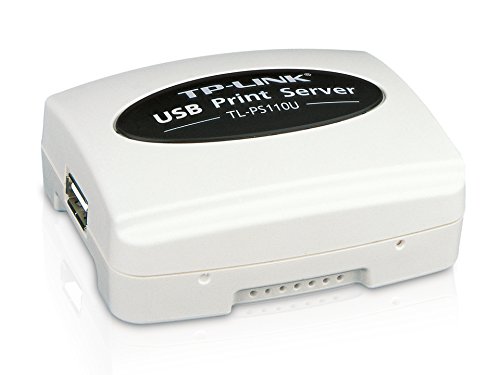
TP-LINK TL-PS110U Single USB2.0 port fast ethernet Print Server, supports E-mail Alert, Internet Printing Protocol (IPP) SMB
- Complies with IEEE 802.3 and 802.3u
- 1 USB 2.0 (high speed)-compliant port, 1 Fast Ethernet RJ-45 Port (10/100Mbps auto sensing)
- Supports DHCP (client)..
- Supports Internet Printing Protocol (IPP) and SMB
- Supports print job log
- Supports telnet, PSAdmin, SNMP, Web, HP Web JetAdmin / HP JetAdmin management
- For more Compatibility information, see the pdf below


Olabiyi Olugbenga Damilare
The TP-Link printer server worked "right out of the box" ...
The TP-Link printer server worked "right out of the box". I have an Epson ET-2550 printer. This printer has a WiFi interface, but it does not support wired network printing. Because of my network configuration I wanted to use wired network printing. The TP-LINK has allowed me to do this. The TP-LINK connects to the USB port of the printer and provides an Ethernet port. I was able to connect this to the network and print from both my Windows 7 system and my Fedora Linux system. If you have connected to a printer via WiFi you will have to remove the printer an reinstall it. Also, note that the TP-LINK device has a USB A connection. My printer has a USB B connection so I needed a cable that had the proper connectors.
Antoinette April Chase
Great work around solution for older printers having a problem connecting via wifi
I use this device as a work around to an issue with my older HP Multifunction printer (Photosmart 7520) the printer does not log back into my wireless router properly after the printer goes to sleep. The result was I had to cycle the printer off and back on to get it to log back into the wireless network. My router can not support the printer via USB because it does not have the printer driver to communicate with the printer via USB. I tried some work arounds that did not get the job done, and finally decided to just add an inexpensive print server that can connect via ethernet to my wireless router and via USB to my printer, hence eliminating the need for the printer to log in to the wifi. The outcome is I can now print via the print server using wifi without recycling the power on my printer. One word of caution. This device will not support the multi functions of the Photosmart, for example the scanner. The solution for that issue is you can cycle the power to communicate with the printer without this print server, or just scan to a USB thumb drive and plug the thumb drive into your computer. In any case, this solved my requirements without having to purchase a new printer so I am very pleased.
Conika Yates
Simple, clean and uncomplicated setup.
Purchased a Canon ImageClass D530 multipurpose printer to replace my broken copier, decided to try putting this USB printer on my network for use with Windows laptops and a Linux desktop. Surveyed the available choices, tried then returned another print server which was a non-starter, then purchased this and an accompanying TP-LINK 10/100 switch. I'm impressed! The TP-LINK took me ten minutes to get it talking on my wired network. Getting the Windows laptops printing with it took a couple of hours, due to my inexperience with this class of printers. The Linux desktop took longest. Canon has Linux drivers for this printer. Finding them was not straightforward. Some other print servers require you pair the D530 with one laptop at a time and provide no Linux support at all. The TL-PS110U supports standard print protocols which work just fine with Windows or Linux, and likely with Mac, provided you are able to locate and install the correct drivers for your printer. The server even talks to Android but I've had no luck so far with D530 drivers and Android. Have not tried it with scanning. The TP-LINK server did what its manufacturers said it would do, simply and cleanly. If I needed another print server I'd buy one of these in a minute.
Meli Tuiavi'i
Great product
The product is great. The installation documentation could use a little more detail though. Do yourself a favor by not plugging it into router unless your router is on the 192.1678.0.0 network. The device comes by default setup with a static ip address of 192.168.0.10. I would much rather see it default to DHCP. When you read the directions it says to connect it and away you go. But I'd suggest this. 1. set your PC nic to 192.168.0.2 2. plug an Ethernet cable into your PC and into the TLPS110U 3. open a browser and login into 192.168.0.10, uname is admin 4. Set the device to use DHCP, save and reboot 5. now you can plug it into your network and continue with the installation. Pros: worked great when I finally got it online. Cons: setup documentation could use work their website does not easily have the setup installation files as stated in their documentation. I've built a few networks over the years and I found it a little clunky to install but I still gave it 5 stars cause it just works exactly for what I need it to do and is priced right.
Domenika Kazdova
Fast setup, Enterprise grade stability.
Product is absolutely fantastic. I work for an IT consulting firm and see a wide range of hardware. I am using two of these to print over a VPN connection, to a terminal server we host in a datacenter across the country. To older Dymo 450 Label printers to boot! I had an archaic Linksys print server that recently died on us, and I bought two to replace another one that has become increasingly unstable. I pulled the print server out of the box, plugged the power in, plugged in an ethernet cable directly from my laptop to the print server, gave myself an IP on the same subnet (192.168.0.1), and the print server web GUI instantly came up when I put in the default IP in my browser (192.168.0.10). I changed the IP address back to what the old print server was set as, and in about 3 seconds after it rebooted ALL of the queued print jobs came through. I instantly threw the CD in the trash so I have not had a chance to evaluate the software that comes with it. The device is set as static on that IP address from the factory, if you are unable to reach the print server web GUI, set your computer to a static IP on the same subnet and you should be able to talk directly to the print server. Pros: * FAST setup, had it up and running in about 5 minutes flat. * Fast web server interface, boot/reboot time is about 5 seconds, and navigation is very snappy. * Great compatibility with older printers (Dymo Labelwriter 450 and HP Laserjet 2025 specifically tested) * Very stable, I never need to reboot these things * Prints are fast and consistent, I don't have a printer fast enough to really test the speed but prints to the laserjet are just as fast as a direct USB connection (only this is over the internet, printing direct IP, through a VPN connection). * I have several of these deployed in large enterprise environments and they simply rock. * Easiest print server I have ever setup Cons: * Looks kind of dated, would be nice if they made it look like a switch or something so it blended in more * No ethernet cable in the box (though I have several boxes full of old cables) * Not gigabit? Would be nice for all my switch LED's to be the same color (just kidding).
Debbra Burns
Excellent product at a reasonable price
I have three computers, with three different operating systems, Windows XP, Vista, and Windows 7, hooked up to my wireless/wired network. Previously, I used my desktop computer running XP to act as a print server for the two laptops connected wirelessly. This worked for the most part, but required having the desktop computer on at all times, not to mention said computer was definitely at the end of its life. I purchased the TP-LINK TL-PS110U and was quite satisfied with its performance right out of the box. I used their software to set up the device on my network, following the directions on the screen. My Windows 7 laptop connected instantly, without any tweaking. The Vista laptop needed some rebooting and reinstalling of the printer before it recognized it. The Windows XP desktop, being the oldest OS and computer, took the longest, which is not surprising. But I found directions on the web from TP-LINK, specifically for Windows XP, that worked perfectly. The print server has been up for 3 solid days and prints flawlessly and quickly from all three PCs. I realize my experience with this product will not be that of the average user. I work for 25 years in the IT department of a large insurance company in NYC and have a great deal of hands on experience with computers and networking. The setup of this device is not exactly "plug and play", but if you follow the directions carefully and keep in mind that different operating systems require different settings, you should be able to get this product to work as advertised.
Teri Fanguy
Print server works great. Directions are horrible
Print server works great. Directions are horrible. If the printer is working properly with a usb connection, step 1 will setup fine on the print server using the included disk. For step 2 you will want to disconnect the usb cable from your computer and plug it into the print server. Delete the printer from the computer. There will be the original usb connection and possibly one the print server software tried to install. Then just install as a network printer and use the IP number your set on the print server while setting up. Use the existing print driver and you should be working fine.
Jessica M Bruce
Good value print server.
Comes with a non-standard default Static IP address which complicates the install. However, one of the FAQs explicitly walks you through how to change it. Once you do that it works great (so far). Throw the setup wizard disk in the dust bin, you don’t need it. Just use the web interface.
Cheryl Warren
Works as advertised
I have a rather unusual setup and needed to replace my 15 year old WPS54G Linksys print server that died on me. I have two routers, one is a netgear and is the primary router for the internet. The other, I use as a switch for two laserjet printers – one color with a built in NIC card. The other is an older B&W USB printer again about 15 years old (HP1160le) which was attached to the Linksys print server that died. The TL-PS110U setup was quick and the printer seems to work fine, like before. Three computers access this print server – Win 7 (x64 bit) and Windows 8.1. The disc is really all you need. The interface is not ideal and I couldn’t tell you if the wizard installs a bunch of malware, but it got the job done in under 5 minutes. You do need to set the i.p. address and if you skip this step during the installation it will not work. In which case go back and repeat the installation process – took about 3 minutes. The default i.p. address is 192.168.0.10. You will need to change this to something that works for your router. The step you have to do this at is where the wizard talks about not setting a password unless you are an IT admin. I just skipped this step thinking this was to set the password only but this step and option is where you change the default ip setting to something that will work with your router.
Shelly Mae
Straight Forward but Technical Setup Required
If you follow the directions and you know what IP address is available outside the DHCP range on your network, the setup is easy. Because the device is so simple and uses an older but universally supported protocol, you have to get every detail right on both the device setup and the computer printer setup in order for it to work. This is definitely NOT AirPrint simple, but it is a very inexpensive way to put an older printer directly on a network. I had an old surplus computer that was acting just as a print server for my LaserJet 1200. The hard disk died, so I just took away the computer and put this device in its place. In a year or so, this device will pay for itself just in electricity savings. Now for the technical part. This is a very simple LPD print server. LPD is an IP protocol from the Unix days. There is no network discovery mechanism, so you have to use a static IP to configure the device and enter that IP on each computer that you want to print to it. The software on the mini-CD will find the device so you can configure it, even if the default IP is not on the same subnet number as your LAN. There is only a single USB port and there is likely no 2-way communication, so it cannot support any kind of multi-function device, ink level feedback, or anything like that, just simple printers. Once set up, it just works. Sure it would be better if it supported AirPrint or Microsoft Network browsing, or whatever OS-X uses for printer discovery, but this is simple and inexpensive and just what I was looking for.